Understanding the Benefits of Using a Gimbal for iPhone
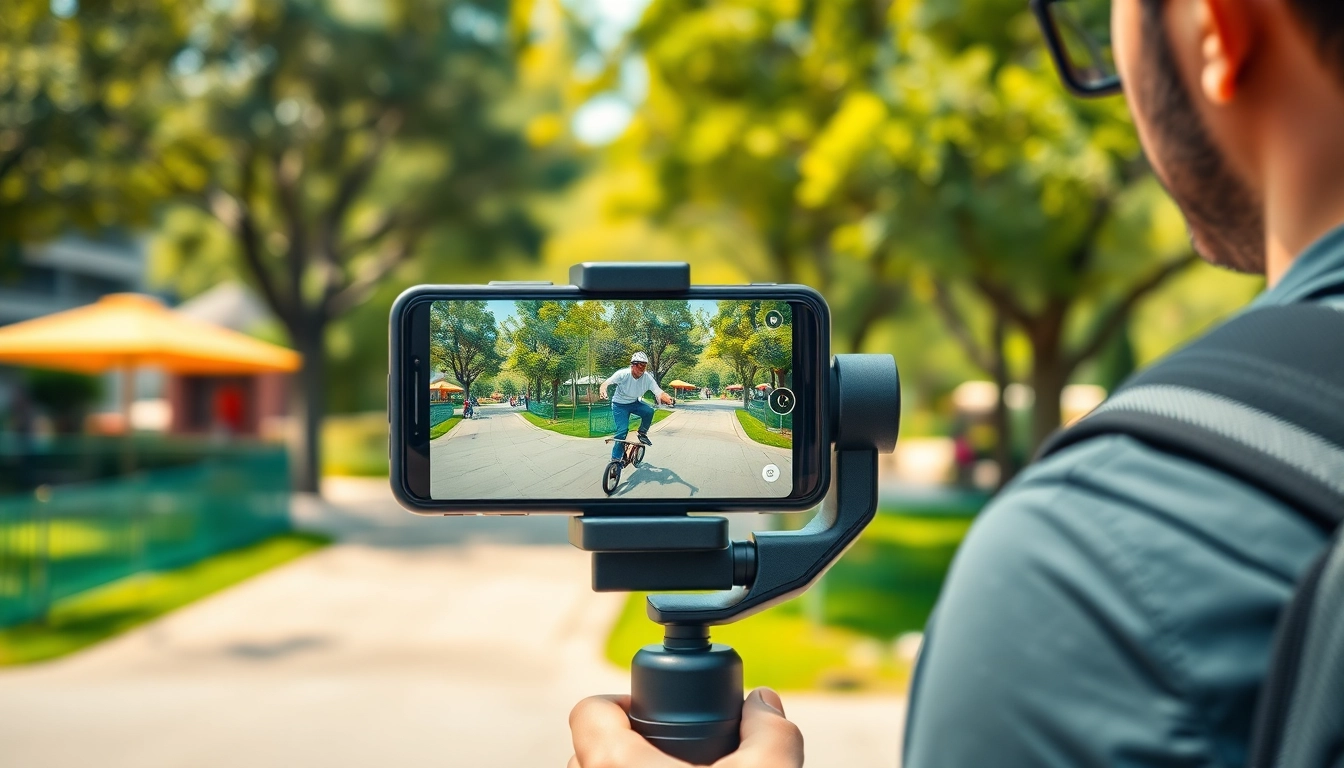
Capturing smooth and professional-quality videos with your iPhone has never been easier, thanks to the innovative technology of gimbals. A gimbal for iPhone provides filmmakers, vloggers, and content creators with the tools they need to elevate their storytelling. This article delves into the numerous advantages of incorporating a gimbal into your smartphone videography toolkit.
What is a Gimbal and How Does it Work?
A gimbal is a pivoted support that allows the rotation of an object about a single axis. It provides stabilization for your iPhone, allowing it to move freely while counteracting any unwanted vibrations and motions. The fundamental principle behind a gimbal is the use of motors and sensors to detect motion and adjust accordingly, keeping the camera steady regardless of how you move. Commonly, gimbals employ a 3-axis stabilization system, which maintains stability along the tilt, roll, and pan axes, resulting in fluid, smooth footage.
Improving Video Quality with Stabilization
One of the primary benefits of using a gimbal is improved video quality. Handheld shots often lead to shaky footage, especially during dynamic movements such as walking or running. With a gimbal, these unwanted jitters are minimized, allowing for incredibly smooth and cinematic shots. This enhancement is crucial for professional-looking content, where clarity and stability can make or break the visual narrative. Furthermore, stabilized footage not only looks more polished but also enhances viewer engagement, making it easier for audiences to focus on the story being told.
Enhancing Filmmaking and Content Creation
Filmmakers and content creators can explore advanced filming techniques with a gimbal for iPhone, such as tracking shots, revealing shots, and smooth transitions. The ability to execute fluid movements allows creators to add a layer of professionalism to their work, whether it’s for social media, vlogs, or more extensive productions. Additionally, many gimbals come equipped with features like zoom control, object tracking, and automatic time-lapse, further expanding creative possibilities.
Key Features to Look for in a Gimbal for iPhone
When selecting a gimbal for your iPhone, understanding the key features is essential for making an informed decision. The right gimbal should cater to your specific needs and enhance your filming experience.
Payload Capacity and Weight Considerations
One crucial aspect to consider is the payload capacity of the gimbal. Ensure that it can support the weight of your specific iPhone model, especially if you plan to use additional accessories like external microphones or lens attachments. Weight considerations extend to the gimbal itself; a lightweight yet robust model is ideal for prolonged use and ease of transport.
Battery Life and Charging Options
Battery performance is another significant factor. Opt for a gimbal with a long battery life to prevent interruptions during shoots. Additionally, check for charging options; some gimbals allow for while-in-use charging, ensuring uninterrupted operation during long videos or events.
Compatibility with Accessories
Considering compatibility with various accessories can enhance your filming capabilities. Some gimbals offer compatibility with external microphones, lights, and filters, which can elevate the production quality. Before making a purchase, verify how well the gimbal works with your current equipment and the flexibility it offers for future upgrades.
How to Use a Gimbal for iPhone Effectively
Mastering the use of a gimbal involves understanding its features and employing the right techniques. Here are vital tips on how to use a gimbal effectively.
Balancing Your iPhone on the Gimbal
Before using your gimbal, proper balancing is critical. This process involves adjusting the gimbal so that your iPhone remains level and does not tip over, regardless of the direction you move it. Most gimbals come with a balancing guide and should be carefully set up before use for optimal performance.
Essential Techniques for Smooth Motion
To achieve fluid movements, practice various techniques such as the “Ninja Walk,” which involves bending your knees slightly and moving smoothly as you walk. Keep the gimbal close to your body to leverage your core strength while minimizing large shifts in motion. Experiment with different speeds and angles to discover what works best for your specific filming style.
Common Mistakes to Avoid
One of the most common errors is not adjusting the gimbal settings according to the filming environment. Different scenarios require specific settings; for instance, high-speed movements may need higher sensitivity settings. Additionally, avoid sudden movements while filming, as this can result in jerky footage, counteracting the purpose of stabilization.
Accessories and Add-ons for Your Gimbal for iPhone
To maximize the features and functionality of your gimbal, consider investing in add-ons and accessories that enhance your filming experience.
Recommended Lens and Filters
Using external lens attachments can significantly broaden your creative options. Wide-angle and macro lenses can offer new perspectives while filters can control light exposure and improve image quality. Look for lens options that are compatible with your iPhone model and easy to attach to your gimbal.
Using Tripods and Stabilizers
In situations where you want a stable base for your shots, consider using tripods in conjunction with your gimbal. Some gimbals come with tripod mounts, making it easy to set up for static shots. This combination can be beneficial for interviews or stationary scenes, providing a solid platform for clarity and focus.
App Recommendations for Filmmakers
Many gimbals have companion apps that enhance usability. Features like custom mode settings, advanced tracking options, and post-production tools can significantly improve your shooting experience. Research apps that are particularly useful for your filming style and that integrate well with your gimbal to streamline your workflow.
Comparing Popular Options for Gimbal for iPhone
When it comes to selecting a gimbal for iPhone, there are numerous options available that cater to varying needs and budgets.
Budget-Friendly Choices
If you are just getting started or looking for an affordable option, many budget-friendly gimbals can deliver quality stabilization without breaking the bank. Look for gimbals that provide essential functions, user-friendly interfaces, and decent battery life while staying within your price range.
Mid-Range Gimbals with Premium Features
Mid-range gimbals often provide a balance between affordability and advanced features. They typically offer longer battery life, enhanced stabilization technology, and additional functionalities, such as tracking and various shooting modes that can add depth to your videography.
High-End Models for Professional Use
For seasoned professionals, high-end gimbals provide superior performance and the latest technology. These models often feature advanced stabilization systems, extended battery life, and compatibility with various attachments and accessories that cater specifically to professional workflow demands. Investing in high-end equipment can drastically improve the quality of your content and open new creative avenues.
In conclusion, using a gimbal for iPhone significantly enhances the ability to create professional quality video content. The benefits of stabilization, improved video quality, and increased filming capabilities make it an essential tool for any serious creator. By considering features, mastering effective usage, and leveraging the right accessories, anyone can take their mobile videography to the next level.